Your car isn’t just a vehicle—it’s a reflection of your personality and a valuable investment you want to last. Yet, professional detailing services can leave a big dent in your wallet, with prices reaching into hundreds of dollars. The good news? You don’t need a fancy detailing shop to give your car the care and attention it deserves. With a little effort and the right techniques, you can achieve professional-level results straight from your driveway—without breaking the bank.
This guide will walk you through the most common car detailing mistakes, how to avoid them, what tools to use, and how to maintain your vehicle’s sparkle long-term. Whether you’re a car enthusiast or someone who just wants to keep their ride looking fresh, this step-by-step tutorial will give you everything you need. Let’s get started.
Common DIY Car Cleaning Mistakes (And How to Avoid Them)
Car detailing at home may sound like a breeze, but many make mistakes that can damage their ride. Here are seven common errors, why they can be harmful, and how you can dodge them.
1. Using Dish Soap as a Cleaner
Many people grab whatever soap they have on hand to clean their car. Dish soap might seem harmless, but it strips the protective wax off your vehicle, leaving the paint exposed to damage from UV rays, dirt, and weather.
Solution: Use a shampoo specifically designed for cars. These are formulated to clean without harming your car’s finish. Affordable options like Meguiar’s Gold Class or Chemical Guys Mr. Pink are gentle enough for regular use.
2. Skipping the Pre-Rinse
Jumping straight into scrubbing a dusty or dirty car is a recipe for scratches and swirl marks. Dirt particles can create fine abrasions on your paint.
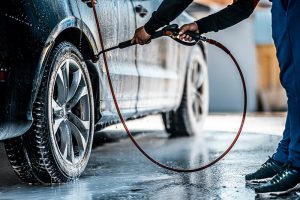
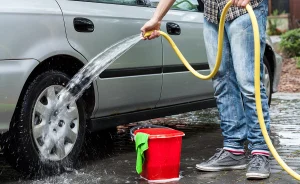
Solution: Always rinse your vehicle thoroughly with water before washing. Use a hose with a nozzle attachment or a pressure washer to remove loose dirt and debris first.
3. Using One Bucket for Washing and Rinsing
Mixing soapy water with dirty rinse water creates a breeding ground for streaks and scratches.
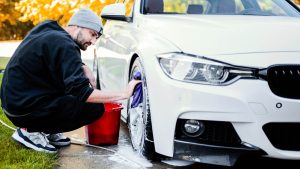
Solution: Use the two-bucket method—one bucket for soapy water and another with clean water to rinse your wash mitt. This separates any dirt particles from your washing process.
4. Washing in Direct Sunlight
Washing your car in direct sunlight can leave water spots behind since the water dries too quickly.
Solution: Clean your car in the early morning, late afternoon, or in a shaded area to avoid spots or streaks.
5. Using the Wrong Towels for Drying
Old bath towels or kitchen rags are too abrasive for a freshly cleaned car, often leaving scratches or lint behind.
Solution: Invest in quality microfiber towels. They’re soft on your car’s surface and absorb water efficiently. Look for towels with GSM (grams per square meter) ratings above 300 for optimal softness.
6. Neglecting the Interior
A spotless exterior means nothing if your interior tells a messy story. Ignoring the cabin leaves dirt, grime, and odors to accumulate over time.
Solution: Vacuum regularly, wipe down hard surfaces with a gentle cleaner, and use odor-eliminating sprays to maintain that fresh-car smell.
7. Forgetting the Wheels and Tires
Dirty wheels drag down the entire appearance of a freshly cleaned car. Some even use harsh products like oven cleaner, which can ruin your rims.
Solution: Use a non-acidic wheel cleaner like Sonax Wheel Cleaner for safe and effective results. Don’t forget to scrub them with a designated brush to remove grime from crevices.
How to Properly Detail Your Car (Step-by-Step)
Taking the right steps ensures your car remains in pristine condition. Here’s how to clean and detail your car properly:
Step 1: Gather the Right Materials
Before you begin, ensure you have these basics:
- Car shampoo
- A high-quality wash mitt
- Microfiber towels
- Two buckets (one for suds, one for rinse water)
- Wheel cleaner and brushes
- Interior cleaner and vacuum
Step 2: Pre-Rinse and Wash
Start by rinsing your car thoroughly to loosen dirt and grime. Use a microfiber wash mitt and car shampoo to clean the exterior, moving in a straight-line motion to avoid swirl marks.
Step 3: Clean Wheels and Tires
Spray your wheel cleaner evenly, letting it sit for a few minutes before scrubbing off grime. Use a separate brush or towel exclusive for wheels to avoid contamination.
Step 4: Dry the Vehicle
Skip the air-drying step to prevent water spots. Use microfiber towels and gently blot the surface to absorb water.
Step 5: Interior Cleaning
Vacuum the interior, wipe hard surfaces with an interior cleaner, and finish with a fabric or leather conditioner to protect materials.
Step 6: Apply Wax or Sealant
To protect your hard work, apply a wax or sealant to the car’s paint. This creates a shiny finish and shields against dust and rain.
Step 7: Final Touches
Don’t forget the windows! Use a streak-free glass cleaner to keep them crystal clear. A quick spritz of tire shine also enhances your wheels’ look.
Must-Have Tools and Materials for DIY Detailing
Here’s what you need to detail like a pro—all budget-friendly!
- Wash Mitt: Soft microfiber mitts are gentle on paint. Look for options under $15, like the Chemical Guys Chenille Wash Mitt.
- Buckets: Use sturdy 5-gallon buckets for the two-bucket method. Most hardware stores sell them for under $10.
- Car Shampoo: Affordable, car-safe shampoos like Turtle Wax Max Power make cleaning effective and easy.
- Vacuum: A handheld vacuum like the BLACK+DECKER Dustbuster helps tackle tight spots in the interior.
Bonus tip: Look out for eco-friendly cleaners that are gentle on your car and the environment. Many are just as effective as chemical-based products!
Maintenance Tips for a Long-Lasting Shine
A single clean isn’t enough—make routine maintenance a habit to keep your car looking brand-new.
- Wash Regularly: Aim for at least twice a month, or more if you drive in muddy or salty conditions.
- Quick Clean Ups: Keep a bottle of waterless wash and microfiber towel in your trunk to handle small spills or bird droppings.
- Protect the Interior: Use sunshades to prevent dashboard wear and vacuum weekly to keep dirt from accumulating.
Fly through your cleaning routine by setting reminders on your phone or calendar. Your car—and future resale value—will thank you for it.
Keep Your Car Clean and Your Wallet Happy
Proper car cleaning doesn’t have to be a chore or cost a fortune. By avoiding common mistakes, using the right products, and following a step-by-step approach, you can achieve professional-level results from home.
Now it’s your turn—grab your tools, turn up your playlist, and get detailing! Want to know more about maintaining your vehicle’s value through proper care? Subscribe to our blog or share your favorite DIY detailing tips in the comments below.
Happy cleaning!


