Keeping your car in pristine condition doesn’t have to mean expensive trips to professional detailers. DIY car detailing has become an increasingly popular trend for car enthusiasts and everyday drivers alike. With the right tools, techniques, and a bit of patience, you can achieve a showroom look from the comfort of your driveway.
This blog will guide you through the benefits of detailing your car at home, the essential tools you’ll need, and step-by-step instructions for a professional-grade finish. Whether you’re a beginner or just looking to refine your technique, this guide is here to turn you into a car detailing pro.
The Benefits of Detailing Your Car at Home
Taking the time to detail your car at home comes with a host of benefits that go beyond aesthetics.
- Cost Savings
Professional detailing services can cost anywhere between $100 to $300—or even more for luxury vehicles. Doing it yourself significantly reduces expenses without compromising quality.
- Flexible Schedule
When you detail your car at home, you do it on your time. No need to schedule appointments or leave your car behind at a shop for hours.
- Personalized Care
DIY detailing allows you to focus on the specifics of your car that matter most to you, whether it’s removing persistent stains or maintaining your favorite paint job.
- Satisfaction of a Job Well Done
There’s something deeply satisfying about seeing the tangible results of your own effort—your car gleaming like it just rolled off the lot.
Essential Tools and Products for a Professional Finish
Before you begin, you’ll need to arm yourself with the right tools and products. Investing in these essentials will ensure your car gets the care it deserves.
Tools You’ll Need
- Sponges and Microfiber Towels: For gentle cleaning and polishing without scratching surfaces.
- Bucket with Grit Guard: Keeps dirt from re-applying itself to your sponge or towel during rinsing.
- Vacuum Cleaner with Attachments: Essential for cleaning dirt and debris from your car’s interior.
- Soft-Bristle Brushes: Perfect for scrubbing carpets, upholstery, and delicate exterior components like grills.
- Dual-Action Polisher (Optional): A lifesaver if you’re serious about restoring your car’s finish.
Cleaning Products
- Car-Specific Shampoo: Avoid dish soap or household cleaners, as they can strip wax and damage the paint.
- Glass Cleaner: For streak-free windows and mirrors.
- Wheel Cleaner: Removes grime from your rims.
- Interior Cleaner: Make sure it’s safe for leather, vinyl, and plastic surfaces.
- Wax or Sealant: Adds a protective layer that keeps your car shiny and shields it from the elements.
Step-by-Step Guide to Detailing Your Car Like the Pros
Follow these steps to ensure your detailing process is thorough and effective, leaving your car spotless and protected.
Step 1: Wash Your Car Thoroughly
Start by rinsing your car with water to remove surface dirt. Use a car-specific shampoo and a microfiber sponge to clean the exterior. Work from top to bottom in sections to prevent soap from drying on the surface. Rinse off thoroughly.
Step 2: Clean the Wheels
Use a dedicated wheel cleaner and a soft brush to tackle brake dust and grime. Pay close attention to the tire treads and rims. Wash and rinse thoroughly.
Step 3: Dry the Car
Use a microfiber towel to dry the car completely to prevent water spots. Avoid air-drying, as this can leave mineral deposits on the surface.
Step 4: Polish the Paint (Optional)
If your car’s paint has scratches or swirl marks, consider using a dual-action polisher with a small amount of car polish. Follow the product instructions carefully for best results.
Step 5: Apply Wax or Sealant
Once the car is clean and dry, apply a layer of wax or sealant to protect the paint. This also gives your car a glossy, polished finish. Use a soft microfiber applicator and buff with a clean towel after the wax has dried.
Step 6: Clean the Glass
Apply a glass cleaner to all windows and mirrors, ensuring they’re streak-free and crystal clear. Wipe with a microfiber towel for a perfect finish.
Step 7: Detail the Interior
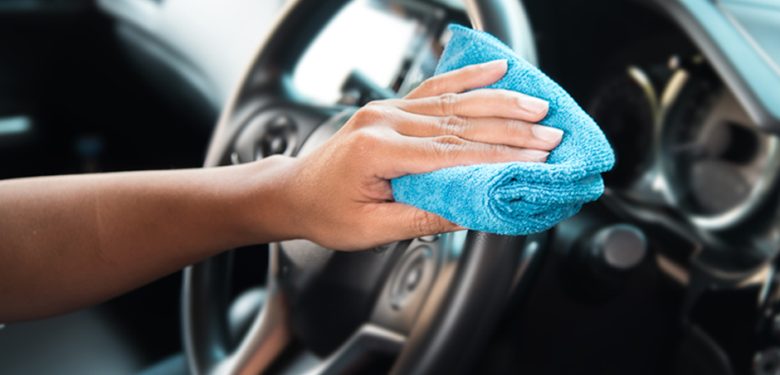
Vacuum the seats, carpets, and floor mats. Use a soft-bristle brush for stubborn debris. Wipe down all surfaces, including the dashboard, door panels, and console, with an interior-safe cleaner.
Special Considerations for Different Parts of Your Car
- Interior Leather Seats: Use a leather conditioner after cleaning to prevent cracking and aging.
- Exterior Trim: Use a trim restorer to bring faded plastic or rubber components back to life.
- Engine Bay: While not necessary every time, a clean engine bay can boost the resale value of your car. Be cautious—cover sensitive electrical parts, and use a degreaser to clean the engine safely.
Tips for Maintaining Your Car’s Shine Between Detailing Sessions
To keep your car looking fresh between detailing sessions, practice these simple habits:
- Park in the Shade or Garage: Protect your car from harsh sunlight that can fade paint and interiors.
- Use a Car Cover: This adds an extra layer of protection against dust, bird droppings, and weather.
- Spot Clean: Keep microfiber towels and a spray bottle of quick detailer on hand for quick cleanups.
- Regularly Vacuum Interior: Prevent dirt and debris from accumulating by cleaning floors and seats regularly.
Why DIY Detailing is Worth the Effort
Detailing your car at home saves money, time, and offers a satisfying sense of accomplishment. More importantly, it helps you build a deeper appreciation for your car while keeping it in excellent condition.
Next time you notice your car could use a little TLC, grab those tools and get to work. You’ll be amazed at the results you can achieve.

